
13. Shop & raffles
The shop should be considered as one of the favorite user features. It’s the place where users can spend their hard-earned coins and tickets for actual prizes of their choice. Making user participation on the platform worthwhile for all users. These prizes can be both digital and physical.
Via Control Panel → Shop
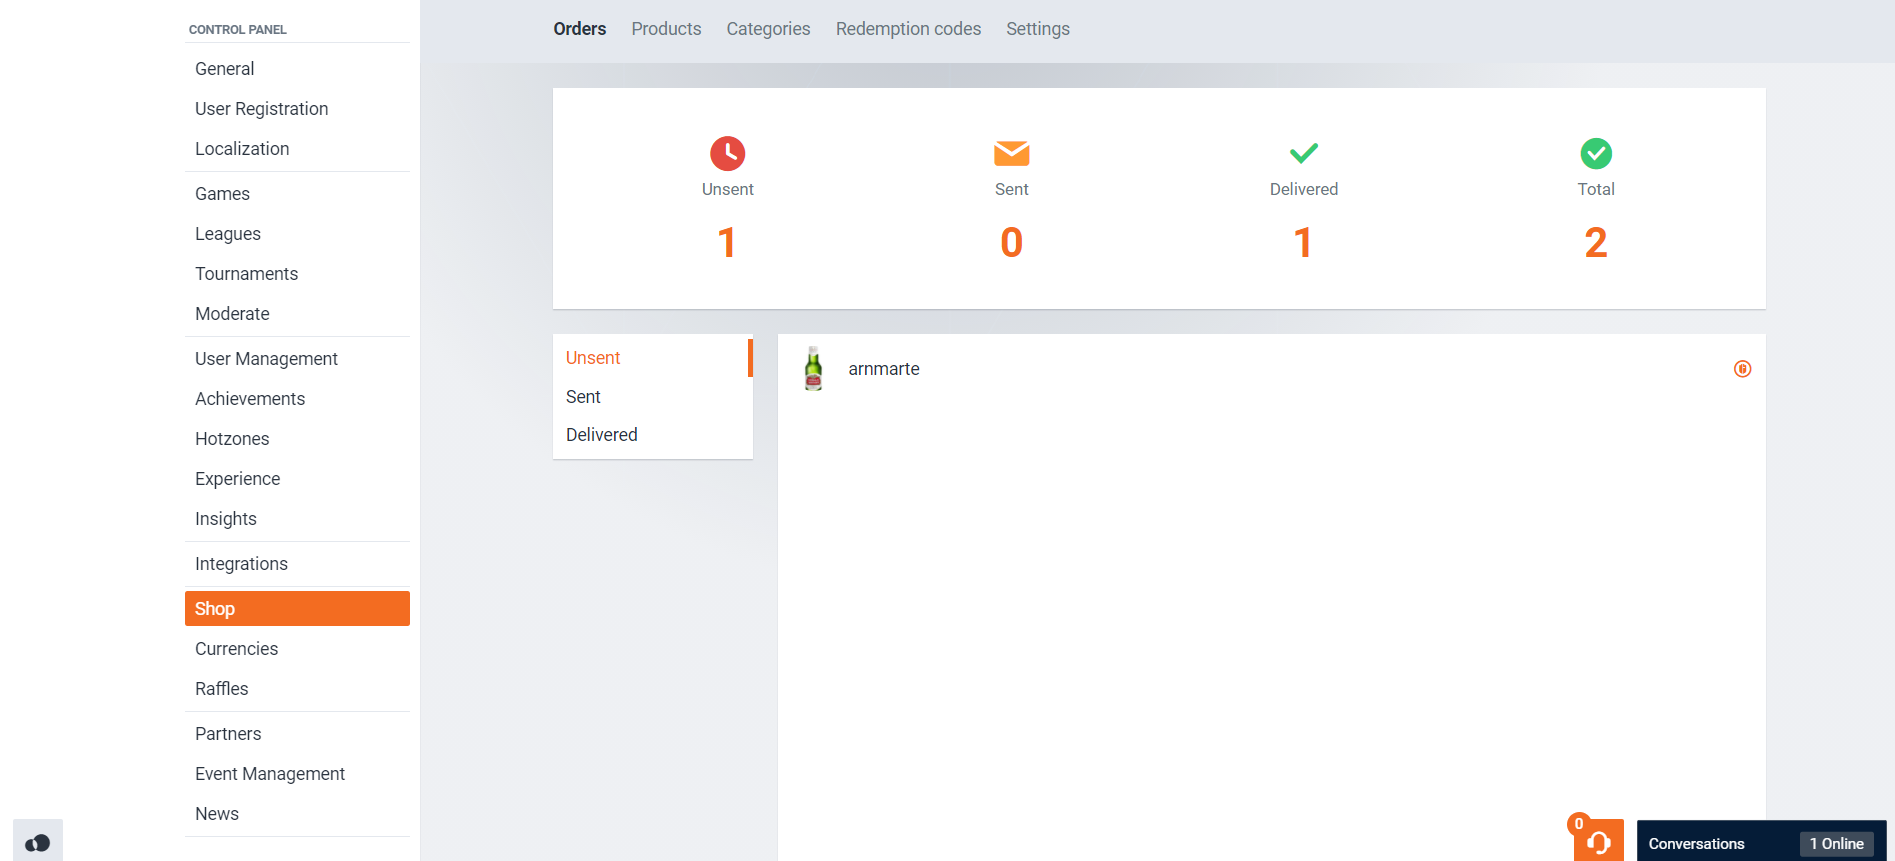
Orders
The first tab will bring you to the ‘orders’ overview. This will provide you with an overview of the shop items. Physical prizes can be tracked down by the administrators for them to safely arrive at the user’s doorstep. Digital prizes can be claimed instantly.
Click a product order and you will be redirected to the order status overview.
A physical product ordered through the shop will run through 3 different phases, being: unsent, sent and delivered. These 3 different phases are shown in the order status overview providing you with both user and order details, as shown below.
Unsent
Shop items in this phase aren’t sent yet. They have been confirmed as ‘ordered’, and it’s up to the platform administrators now to process this order.
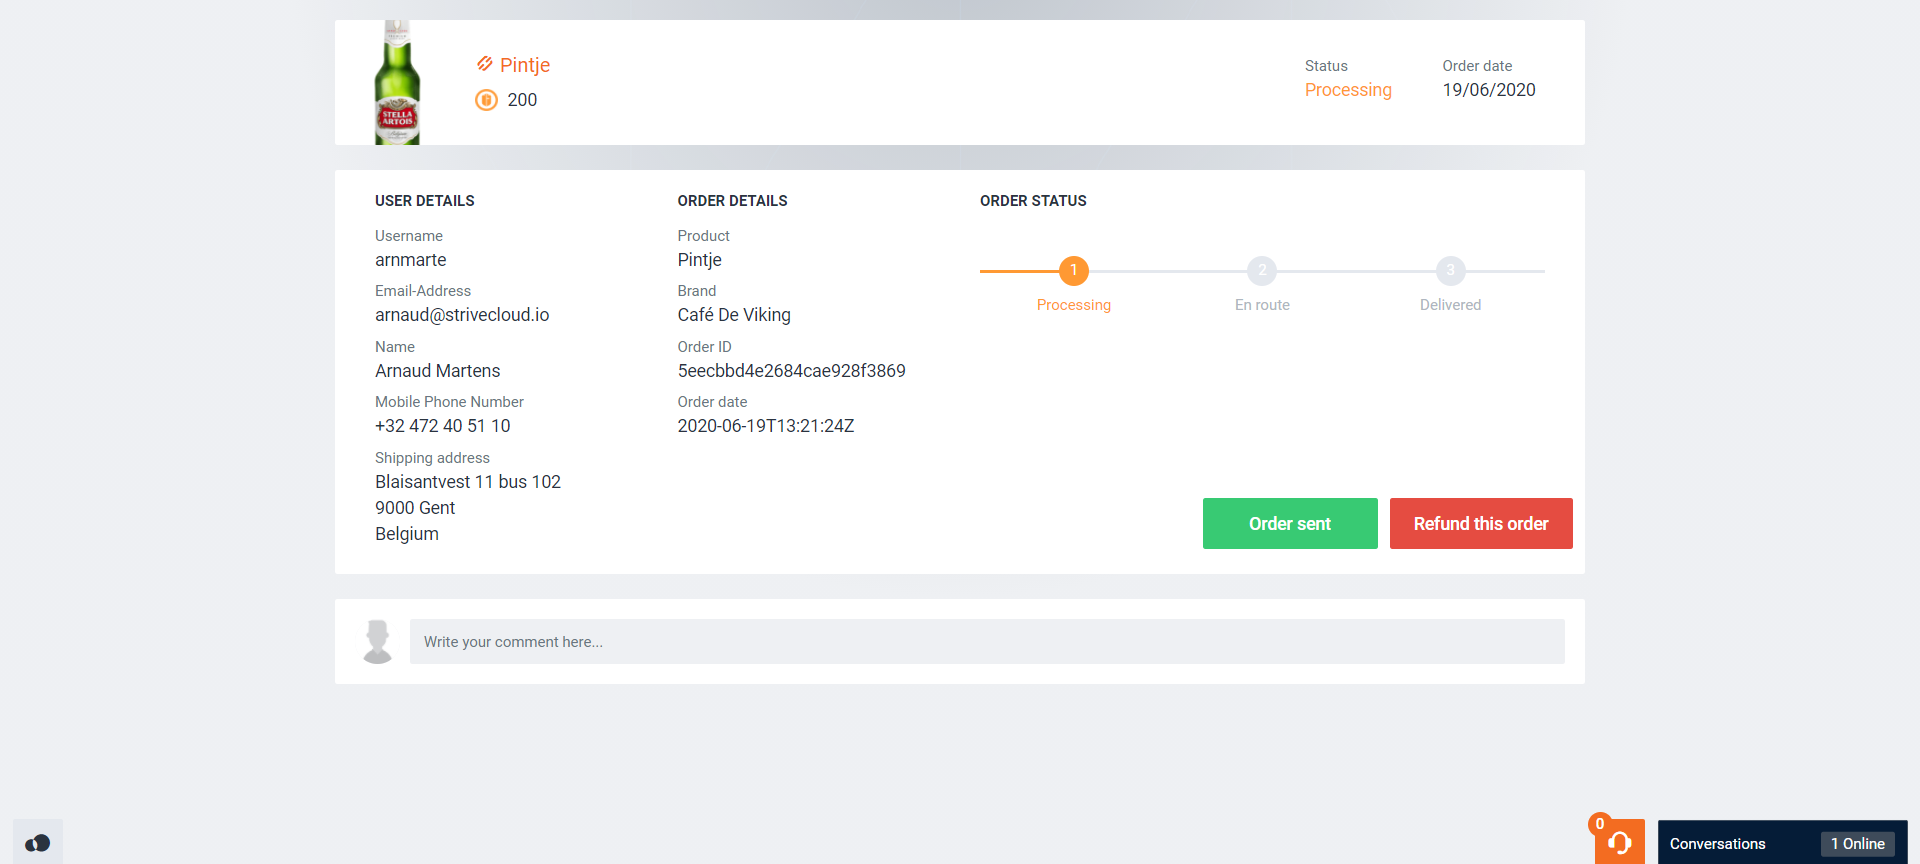
This phase is indicated by the status ‘Processing’. From here on you either confirm that you’ve sent the order or provide the user with a currency refund.
To confirm the shipment of the shop item, click the ‘Order sent’ button.
To provide a refund, click the ‘Refund this order’ button.
Sent
Whenever you have confirmed the shipment of an item by clicking ‘order sent’. This item will be moved to the ‘Sent’ phase. The phase is indicated by the status ‘En route’.
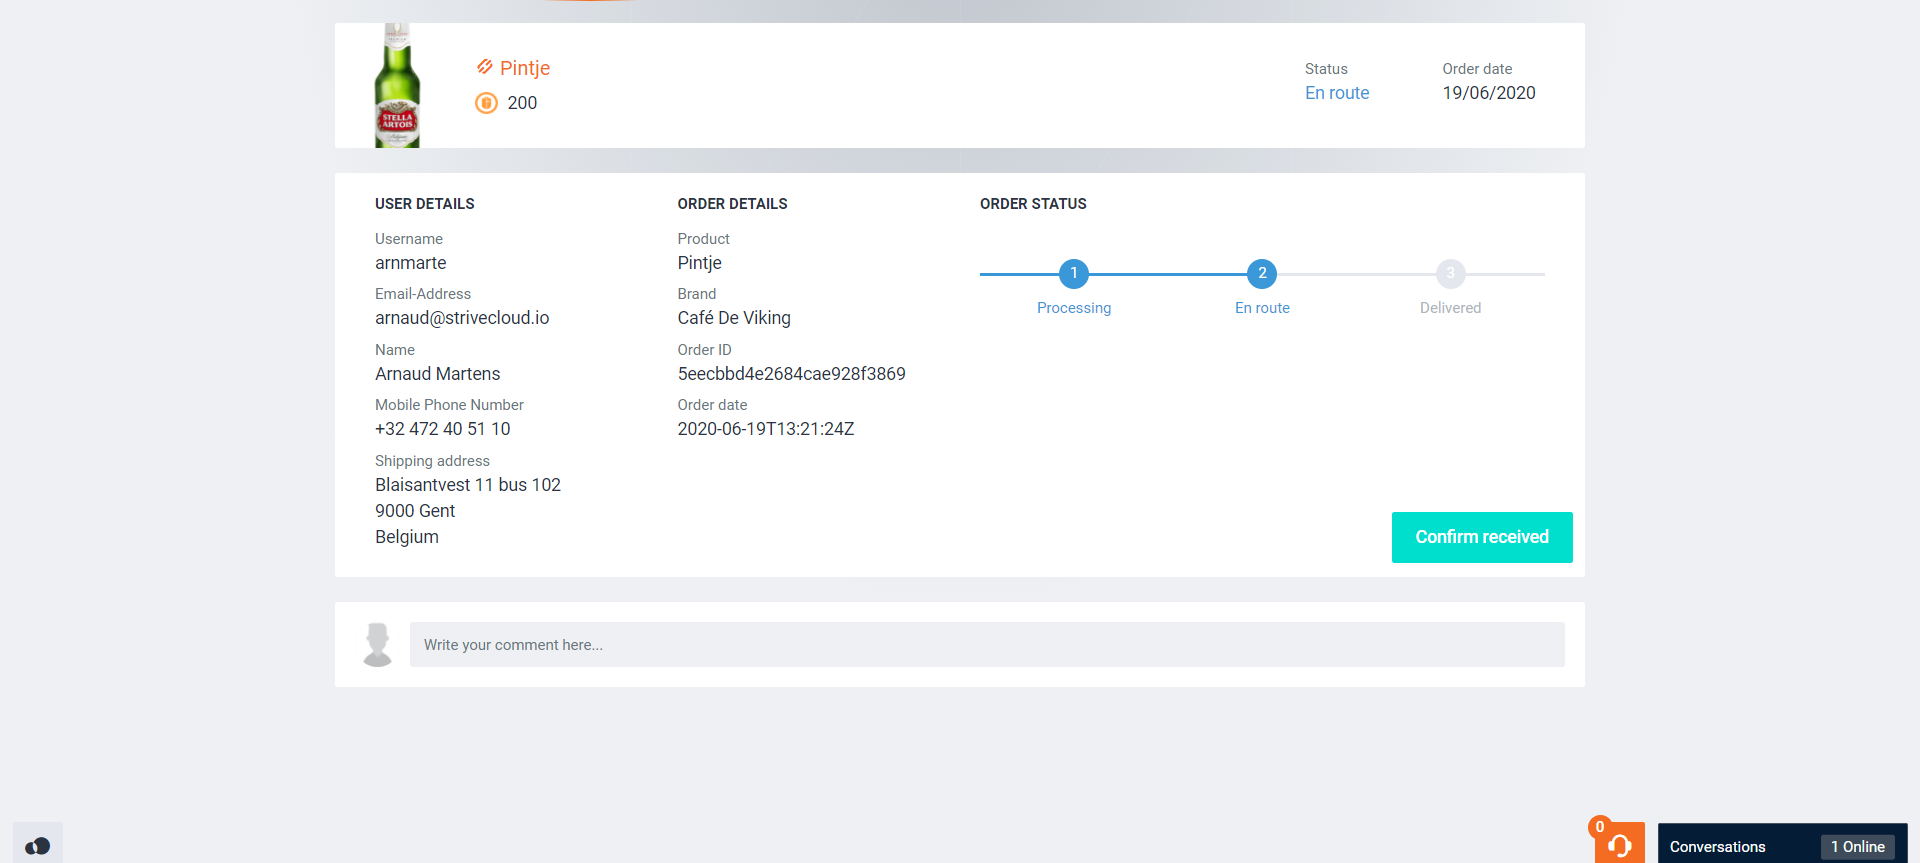
When you have received confirmation from your mailing service that the item has been delivered to the user, click the ‘Confirm received’ button. This will place the order into the ‘Delivered’ phase.
Delivered
When the shop item is delivered to the user and you have received the confirmation accordingly, the following screen will appear:
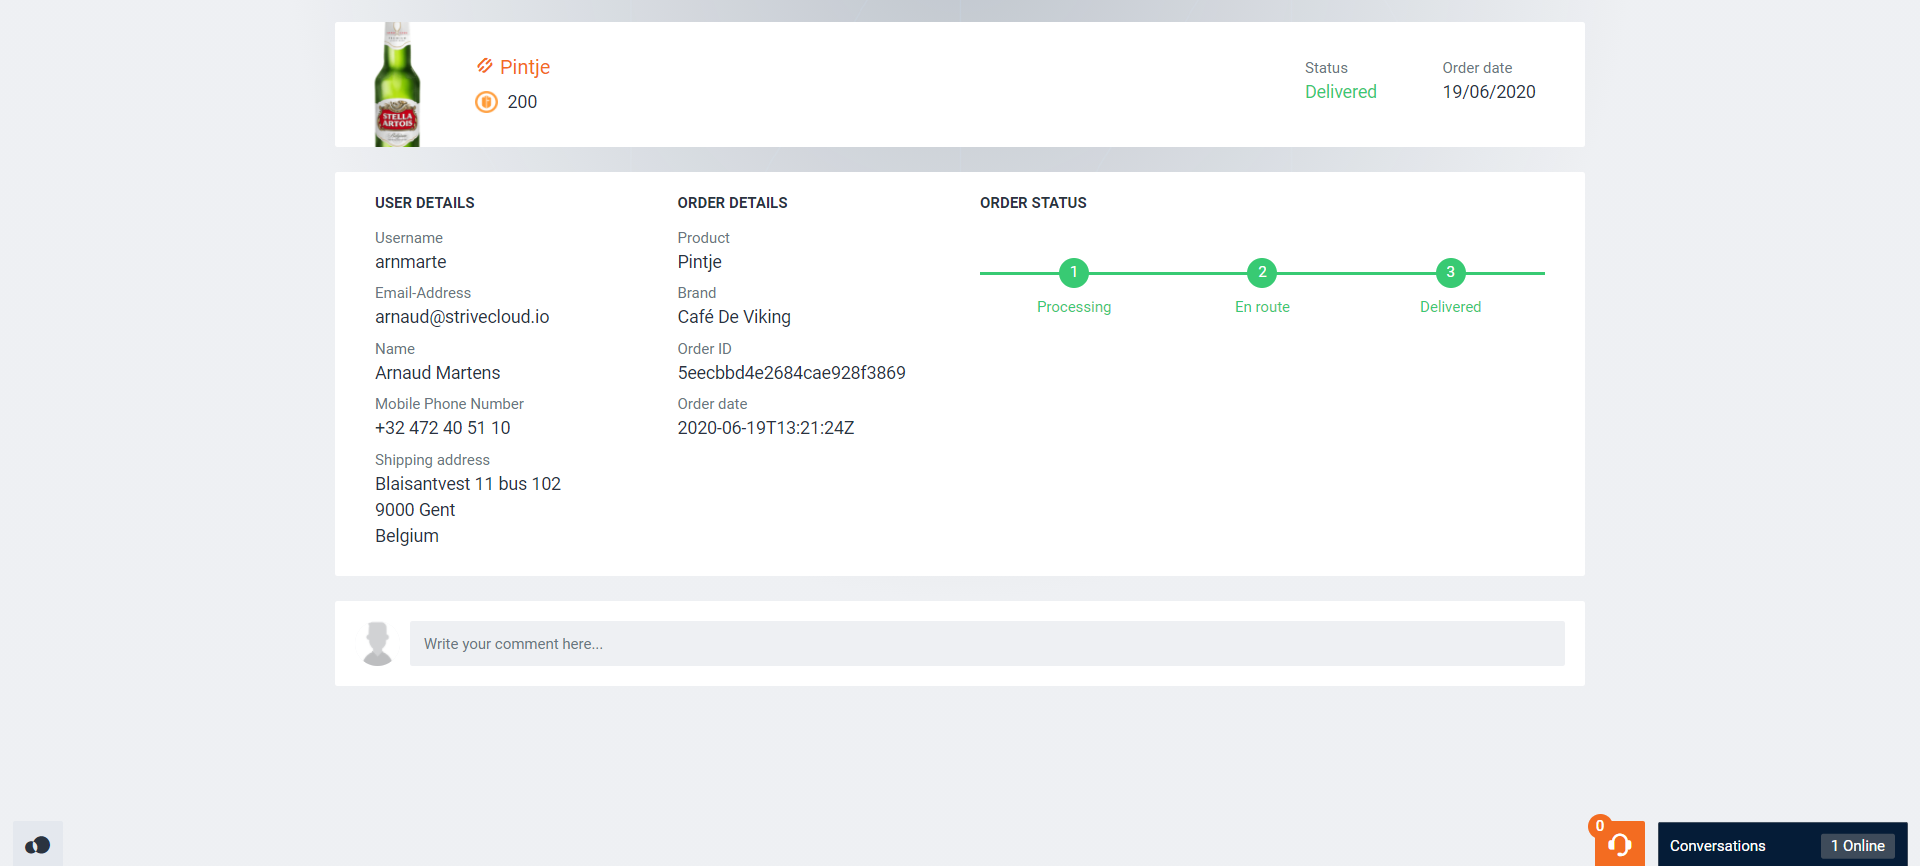
The purchase of the shop item is now completed.
Products
In order to present prizes to be purchased in the shop, you’ll need to add products.
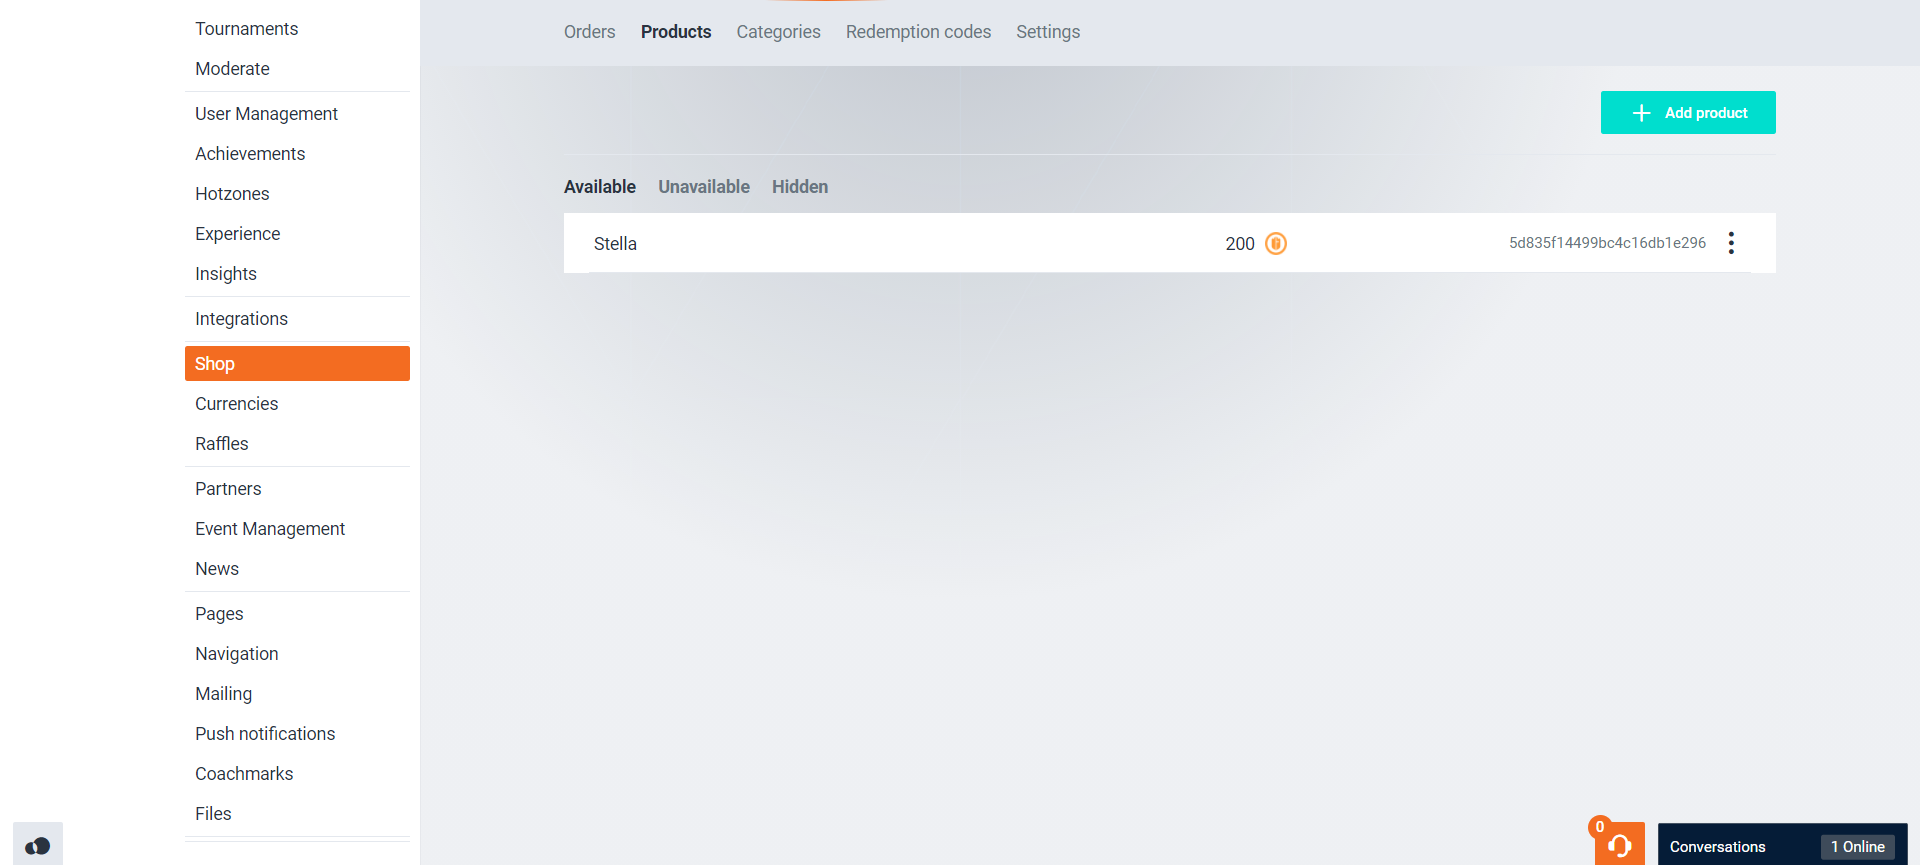
A product can either be available, unavailable or hidden. This is determined by the amount of stock and whether you want hide the item from display via the product settings.
To add a new product, click the ‘+Add product’ button:

The following screen will appear:
Name: Give the product a name Description: Provide a description of the product URL: Insert link to the original product’s page Category: Assign to a product category Digital: Determine whether or not this product is digital | 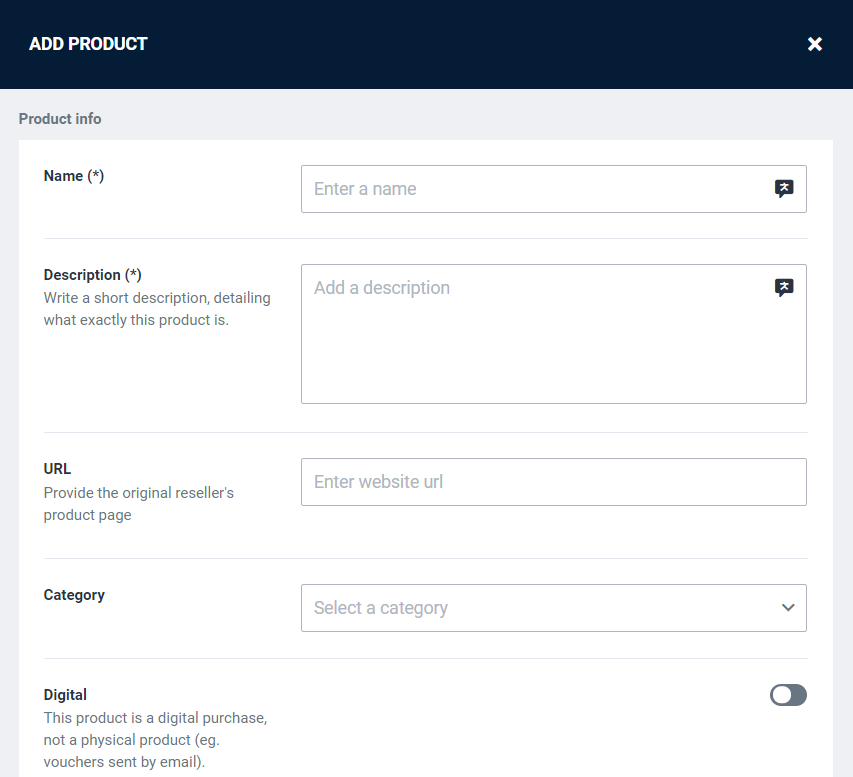 |
Available: Display product as available Stock: Submit the amount products in stock Hidden: Hide the product Brand: Link the product to a platform based brand Delivery time: Submit an estimation of the delivery time Ability: Include an ability Note: Abilities allow users to have extra customization options for their platform profile. | 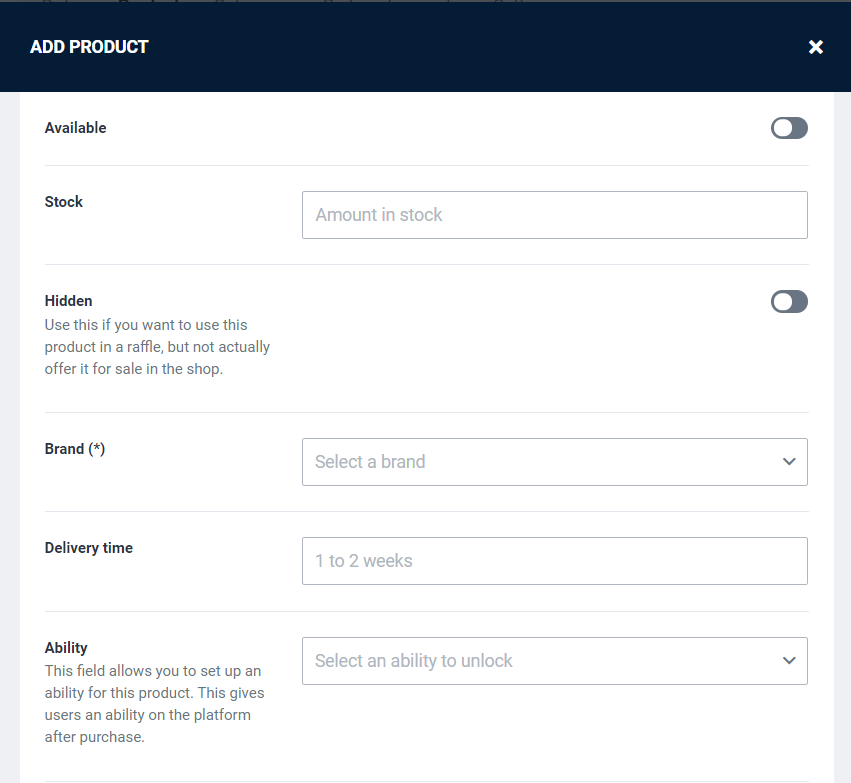 |
Question: Present the user with product related questions, allowing the user to choose specific product properties. Note: Often used for sizes - small, medium, large, XL | 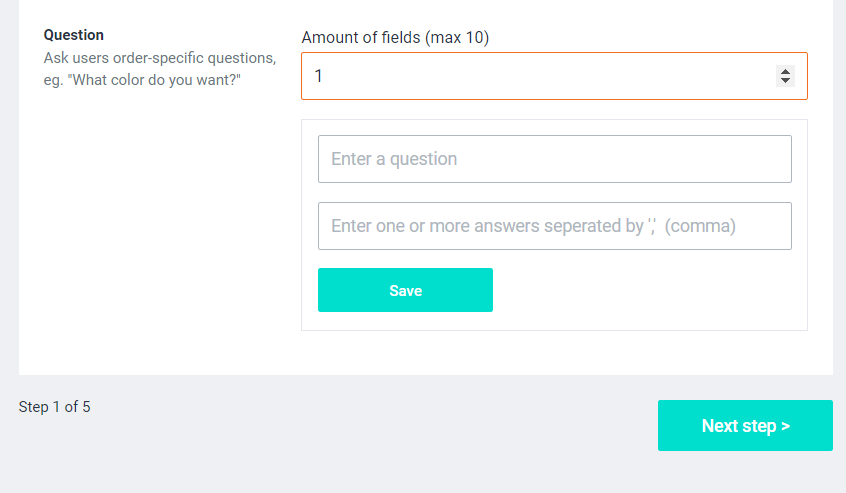 |
Maximum amount: Set a purchase limit per user. Maximum amount duration: Set a duration until the purchase limit resets. |  |
Currency: Choose which currency the user should use to pay for the product. Note: More information about ‘Currencies’, can be found here Price: Set the amount of currency that needs to be paid in order to purchase the product Actual price: The actual price of the product in national valuta | 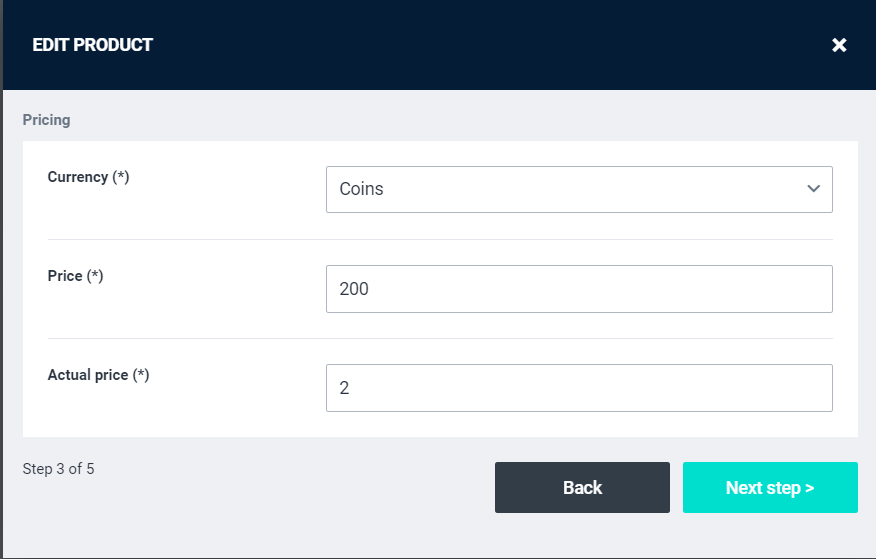 |
Country: Select the country/countries to which the product can be shipped. Age from: Set a lower limit for the age restrictions. Age to: Set an upper limit for the age registrictions. | 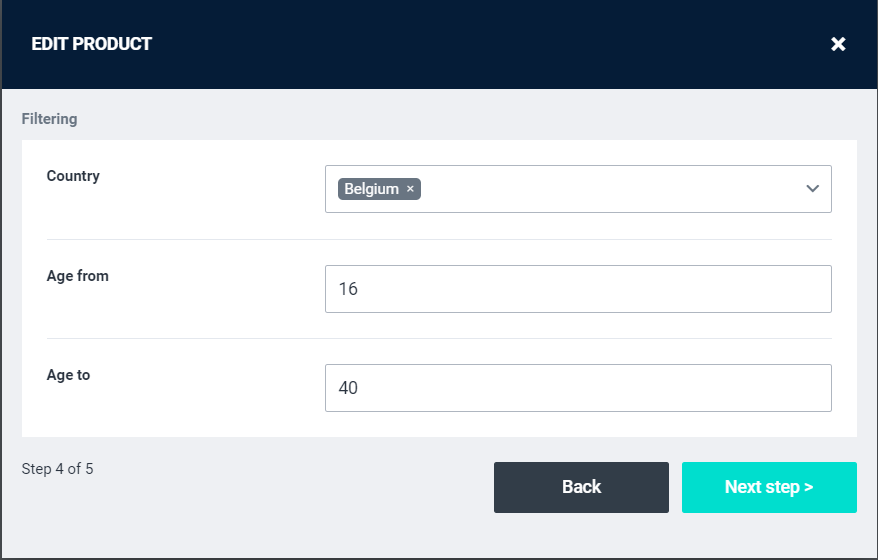 |
Product image (light theme): Upload an image of the product to display in the light theme Product image (dark theme): Upload an image of the product to display in the dark theme | 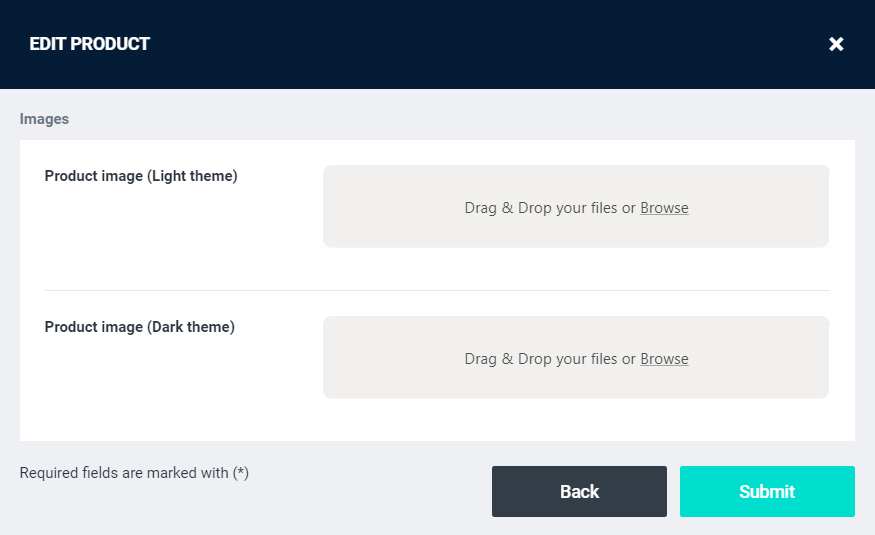 |
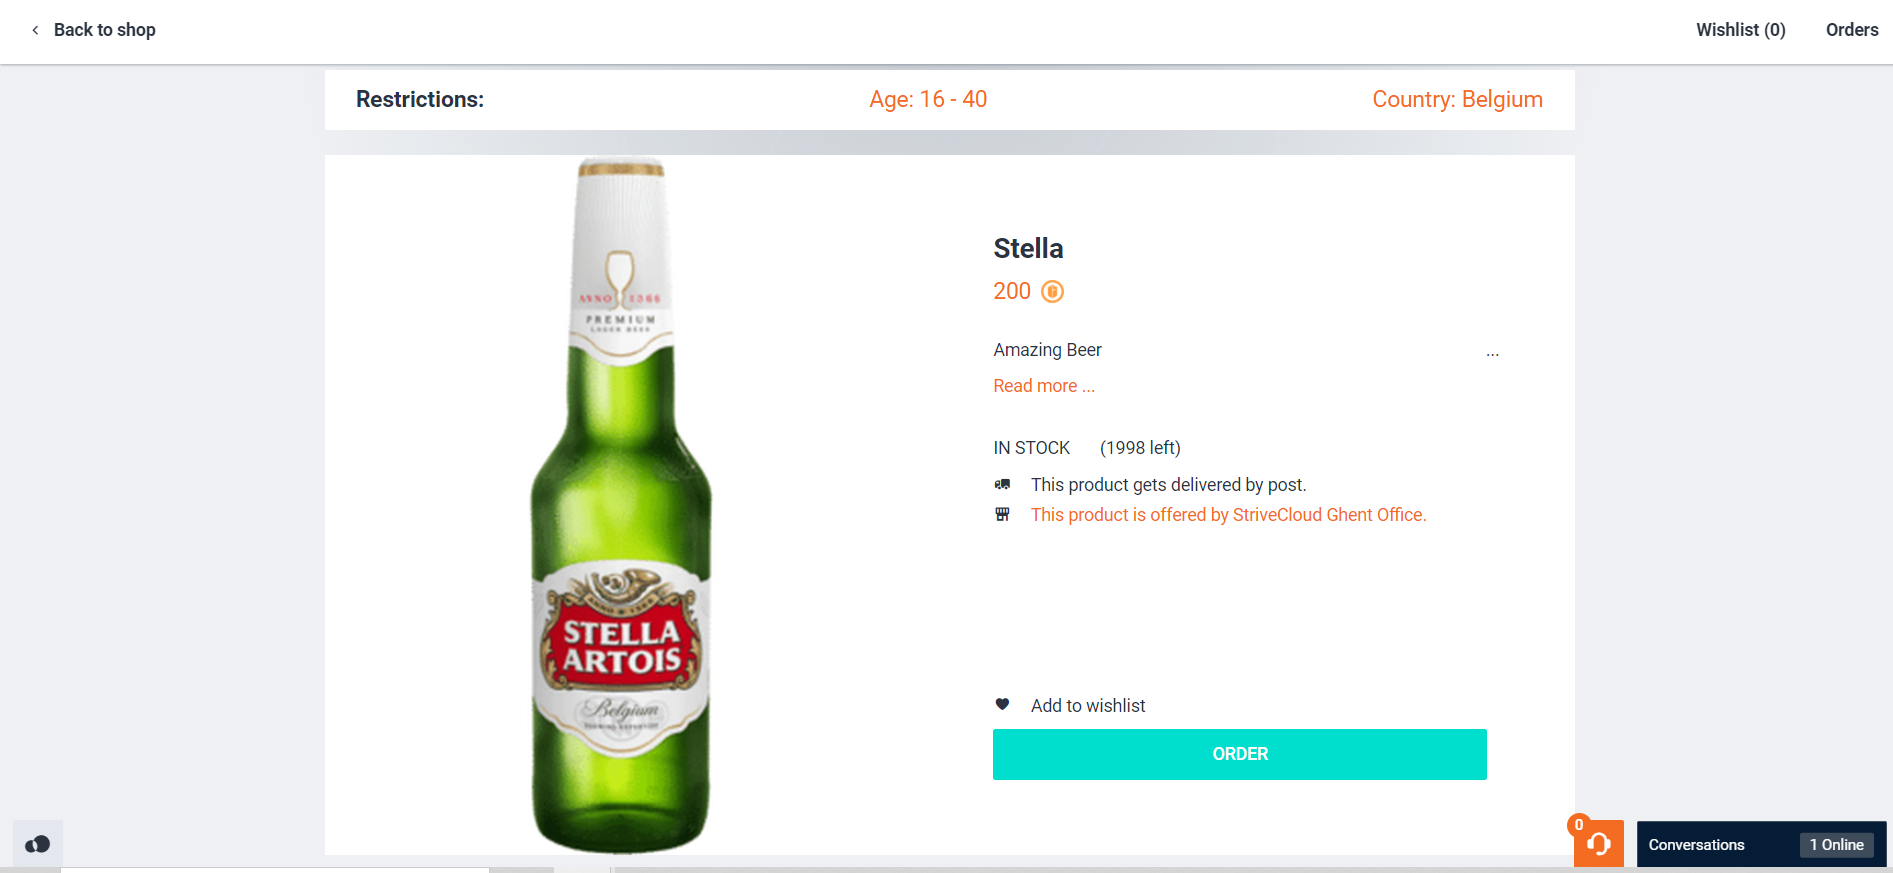
The setup of the new shop item is now completed. Click ‘View product’ to view the item from the shop.

Now you can see the display of your new product, which will look something like this:
Categories
You can sort shop products by category.
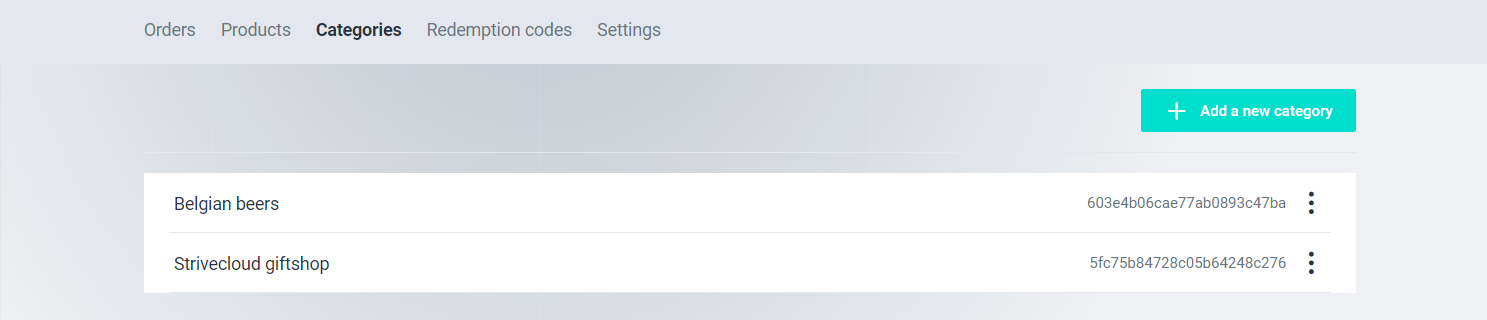
To add a new category, click the ‘+Add a new category’ button:

The following screen should appear:
Category name: Submit a name for the new product category |  |
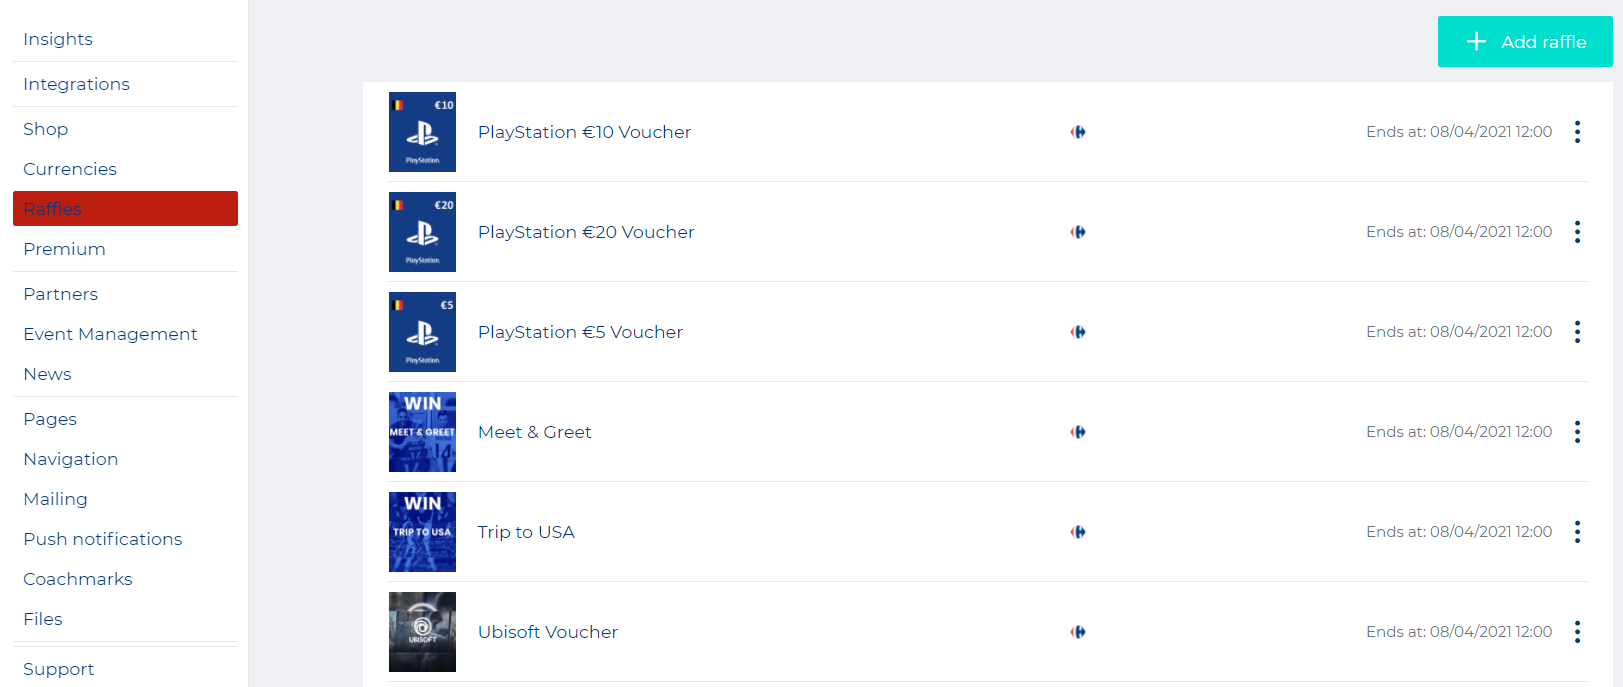
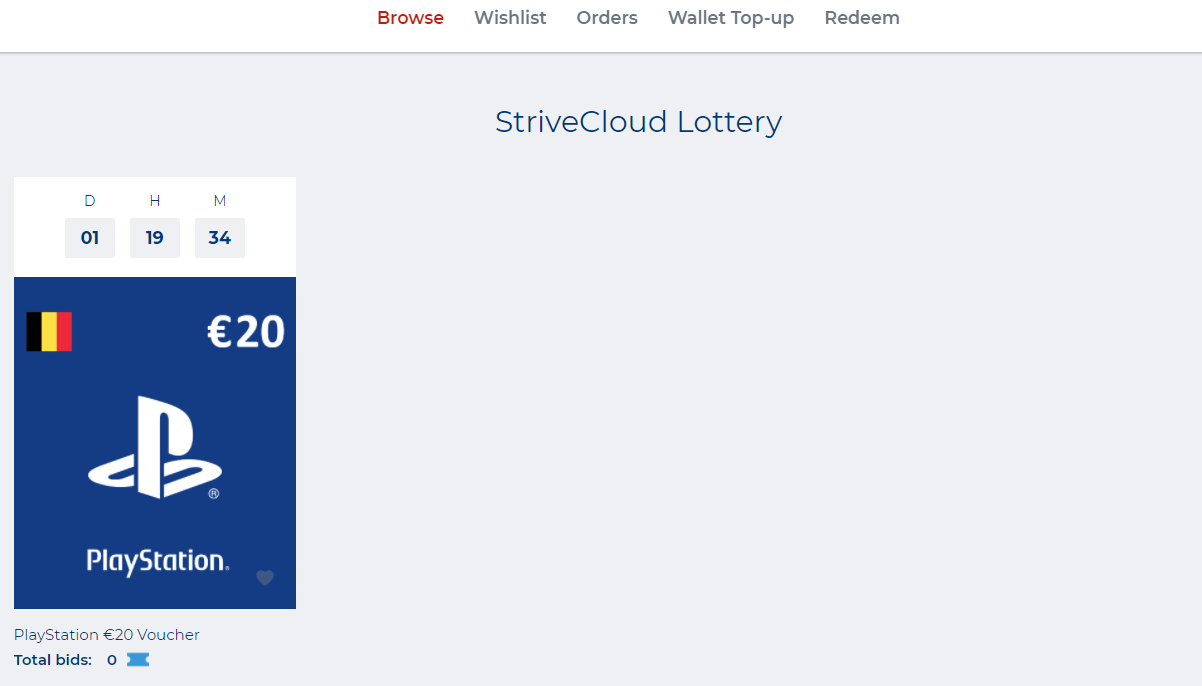
Raffles
Raffles offer the users a chance at winning shop items or other unique prizes. To be eligible to win these prizes, users are required to submit ‘tickets’ in these raffles. The more tickets you submit, the more chance a user has to win the raffle.
Via Control Panel → Raffles
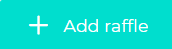
To add a new raffle item, click the ‘+Add raffle button’:
The following screen will appear:
Ends at: Select when the raffle is supposed to end, determine the date and hour. When the raffle is over the linked product will be rewarded to the winner Product: Select a product from the shop to give as a reward to the winner. Note: These products can be added via Control Panel → Shop → Add product Currency: Determine the currency used to bid on the product. Note: 'Tickets' are often used as a default currency for these raffles. Amount of winners: Determine the amount of users that can win the product. Max. amount to bid per user: Sets a limit to the amount of currency units that be can be used to bid on the product. | 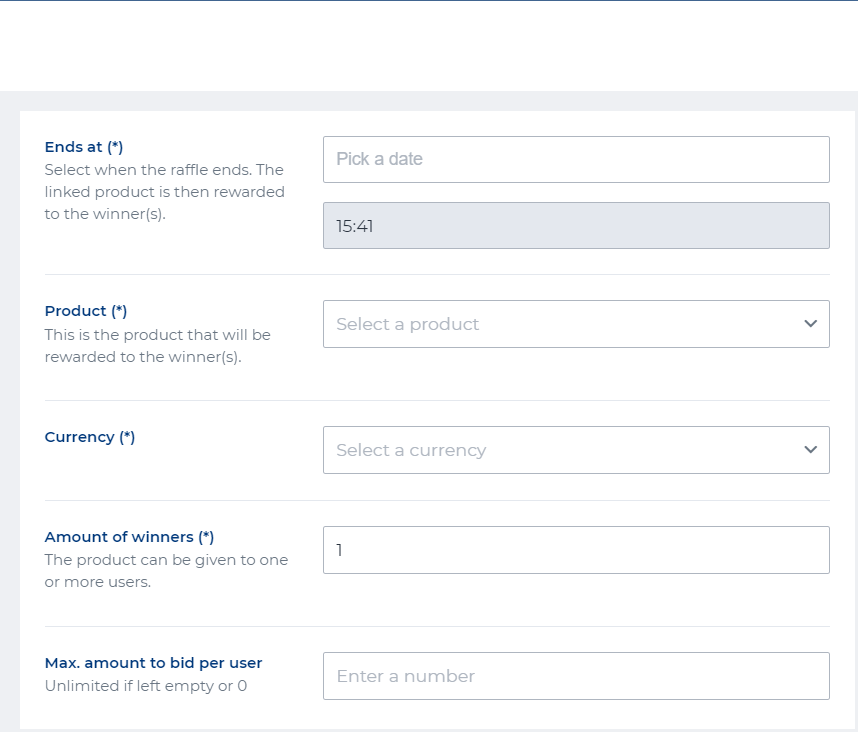 |
When the setup is done, the raffle product can be found in the shop. This could look something like this:
Click the raffle item:
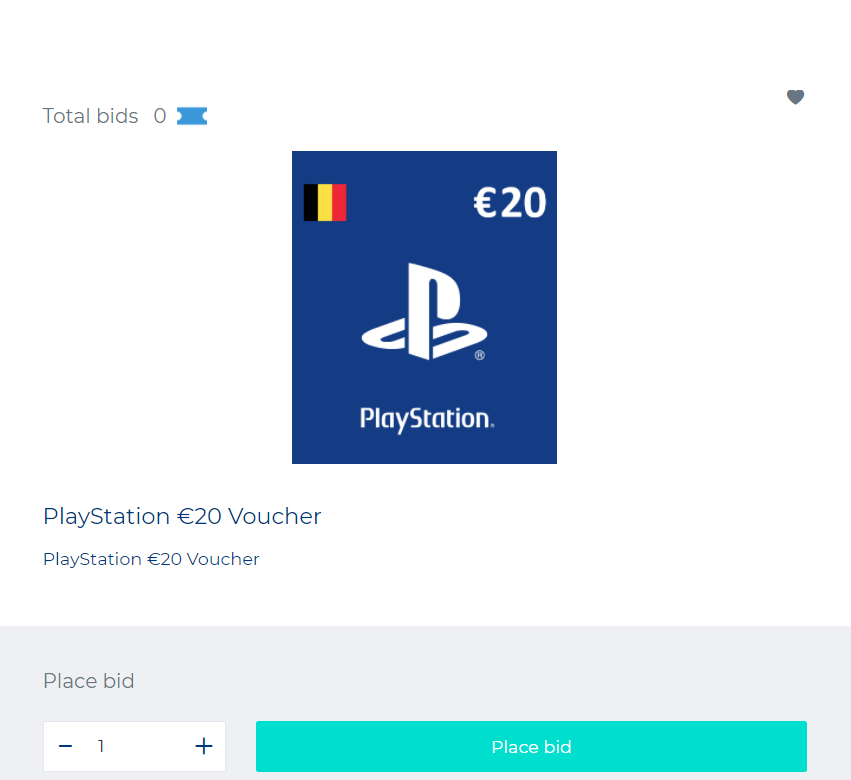
Users can now place their bids. Depending on the max. amount to bid per user you place multiple bids in order to increase a user’s chance to win the raffle product.
Redemption codes
Through the setup of composer pages, you can add code redemption blocks to your pages. You can set up these redemption codes here. More information on how to set up these code redemption blocks on your pages, can be found here
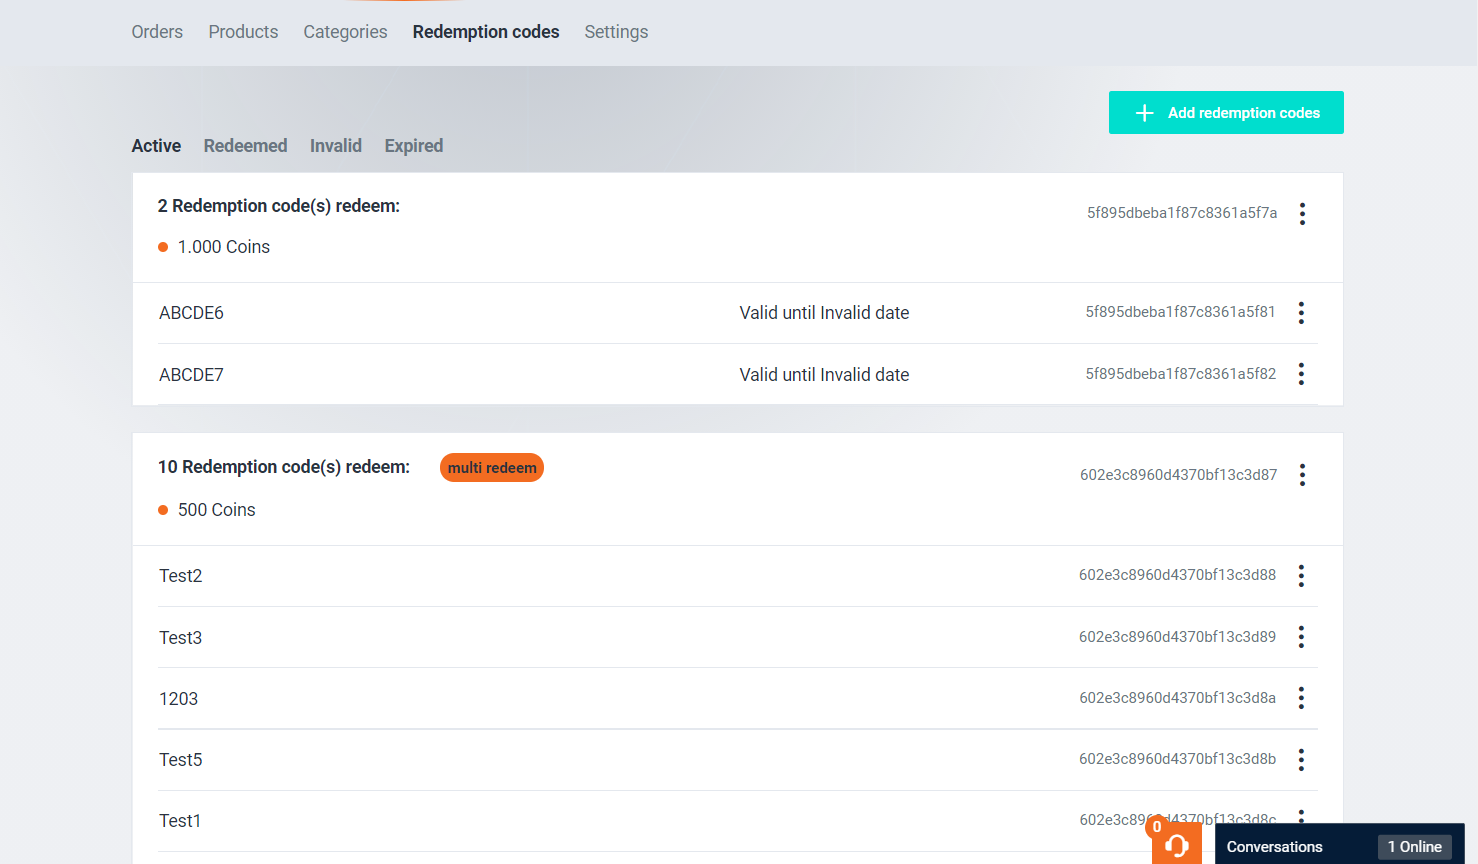
Redemption codes can be either active, redeemed, invalid or expired. You can see an overview of all redemption codes on the platform per status.
Redemption codes can serve a single-use or multiple uses, as displayed by the ‘muli redeem’ label.
To add new redemption codes, click the ‘+Add redemption codes’ button:

The following screen should appear:
Upload a csv file: Redemption codes should be uploaded by a csv file. Upload the file here. Give a currency: Determine whether a currency should we rewarded to the player for redeeming the code(s). Currency: Determine which currency. Amount: Determine the amount of currency. | 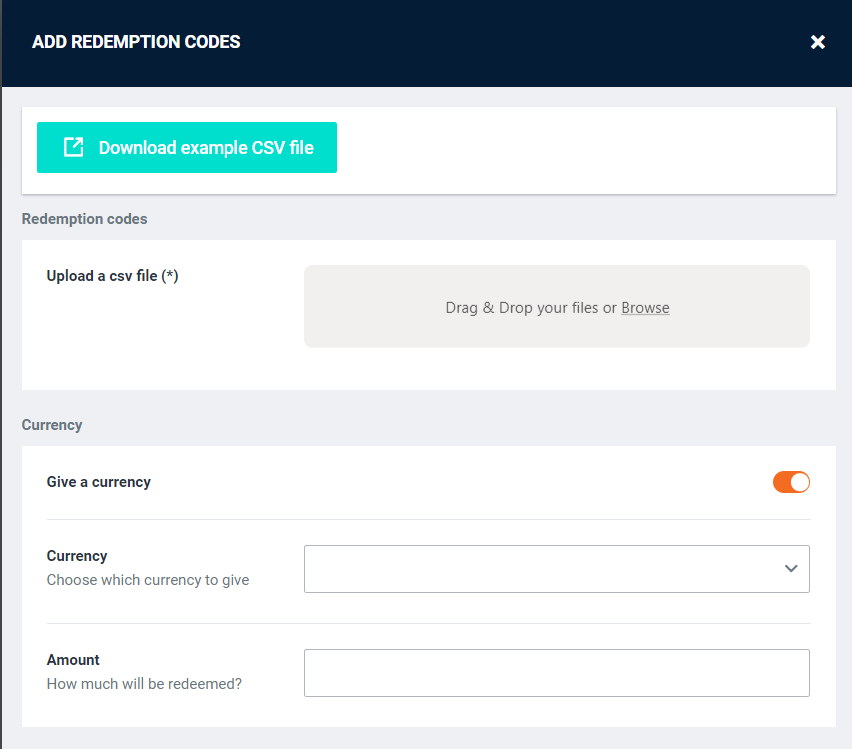 |
Product: Determine whether an item should we rewarded to the player for redeeming the code(s). Badge: Determine whether a badge should we rewarded to the player for redeeming the code(s). Optional expiry date: Submit a date on which the redemption codes will expire. Multiple: Determine whether the codes can be redeemed multiple times. | 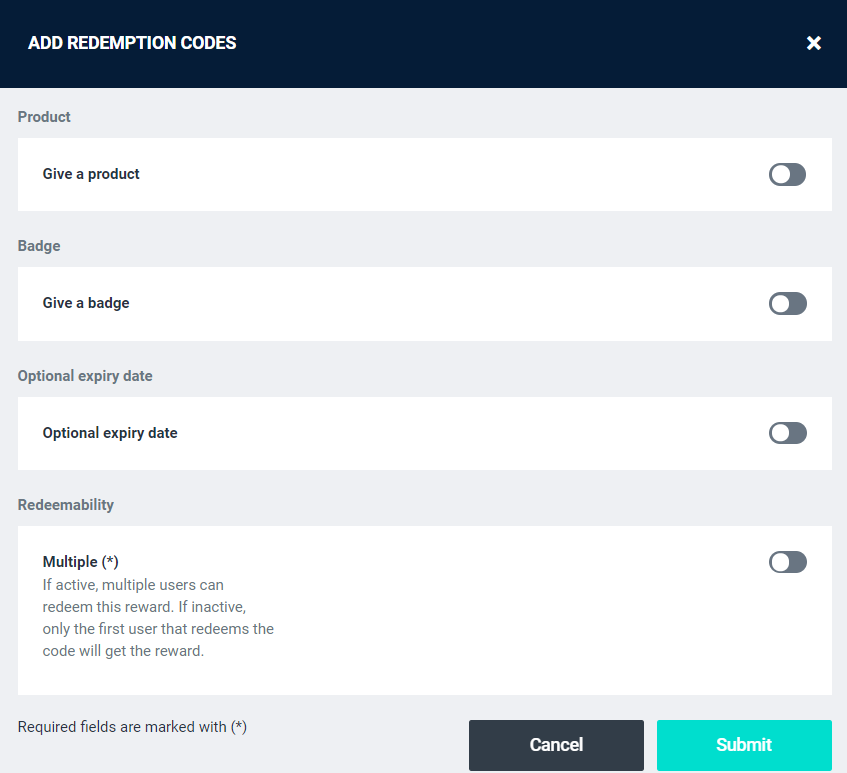 |
Settings
Additional options for the general shop setup, can be found here.
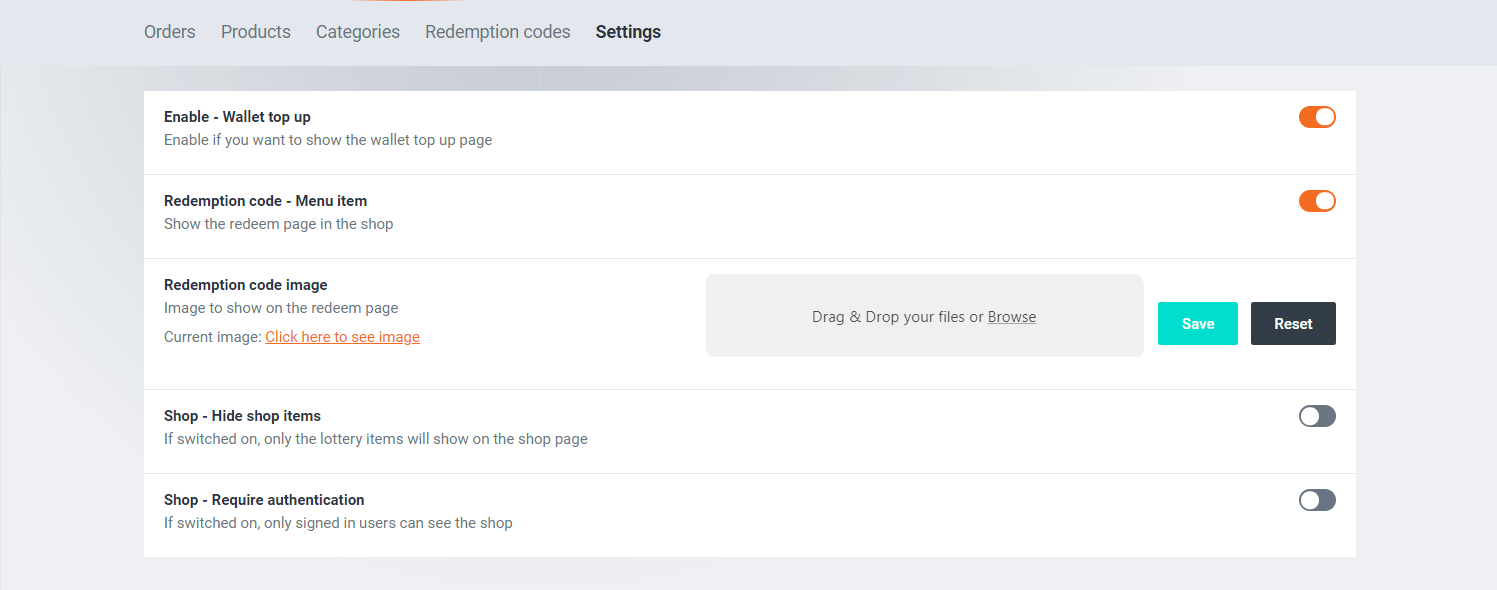
Enable - Wallet top up: Enable to display the user wallet in the menubar
Redemption code - menu item: Enable to display the redeem page in the shop.
Redemption code image: Upload an image to show on the redeem page in the shop.
Shop - hide shop items: Enable to hide all shop items, only the lottery ticket items will be displayed.
Shop - require authentication: Enable to make the shop only visible to logged in users.